Recent Posts
Winter Storm Damage Restoration for Homes in Lafayette
1/14/2025 (Permalink)
Winter storms can cause serious damage to homes in Lafayette, leaving homeowners dealing with issues like water leaks, frozen pipes, and structural damage. When the unexpected happens, SERVPRO of Lafayette is here to provide expert winter storm damage restoration services tailored to your residential property needs.
Our team understands the urgency of storm-related damage and is available 24/7 to respond quickly. We begin with a thorough assessment of your home to identify all areas impacted by the storm. From water extraction and drying to structural repairs, we use advanced tools and proven techniques to restore your home to its pre-storm condition.
Frozen pipes are a common issue during winter storms, often leading to significant water damage. Our experts handle pipe repairs and water removal efficiently, ensuring your property is safe and dry. Additionally, we take measures to prevent further complications, such as mold growth caused by lingering moisture.
We know how stressful storm damage can be, which is why we work closely with homeowners throughout the restoration process. Our goal is to provide prompt and reliable service, minimizing disruption to your daily life.
Don’t let winter storm damage leave your home vulnerable. Trust SERVPRO of Lafayette to handle the cleanup and restoration with professionalism and care. Call us today for fast, dependable service and let us make your home "Like it never even happened."
Water Damage Restoration Services in Lafayette
10/30/2024 (Permalink)
Water damage can be a major disruption for Lafayette residents, leading to structural damage, mold growth, and costly repairs if left untreated. SERVPRO of Lafayette specializes in fast, reliable water damage restoration to keep your property safe and secure.
Our certified team understands that quick response is essential to minimize water damage. We start by assessing the extent of the damage, followed by thorough water extraction, drying, and dehumidification. Using state-of-the-art equipment, we remove all moisture from hidden areas, ensuring your home or business is protected against mold growth and further structural issues.
DIY water cleanup may leave behind moisture that can lead to future problems. SERVPRO of Lafayette has the training and tools needed to provide a comprehensive cleanup and full restoration, returning your property to its pre-damage condition.
For dependable water damage cleaning in Lafayette, contact (337) 269-6332. Our team is ready 24/7 to help restore your property and bring peace of mind.
Mold Damage Cleanup and Restoration in Lafayette
10/30/2024 (Permalink)
In Lafayette's humid climate, mold damage is a common problem that can quickly spread in homes and businesses after water exposure. Mold not only damages surfaces but also poses potential health risks. SERVPRO of Lafayette offers specialized mold damage cleanup to ensure a safe, mold-free environment.
Our mold remediation process begins with an inspection to locate all affected areas. We then contain the mold to prevent the spread of spores to other areas. Using advanced cleaning and sanitizing equipment, we remove all visible mold and treat the area to prevent regrowth. Our team also ensures that moisture sources are addressed to keep mold from returning.
Attempting to remove mold yourself can often spread spores further. Professional mold cleanup and restoration process provides thorough and lasting results.
For reliable mold damage cleanup in Lafayette. We’re here to help restore your property to a safe condition, protecting both your health and your space.
Contact: (337) 269-6332
Handling Biohazard Situations Safely in Lafayette
7/26/2024 (Permalink)
Biohazard situations require specialized handling and disposal. Here’s what you need to know:
- Stay Clear: Avoid the affected area to prevent exposure.
- Call Professionals: Contact certified professionals for biohazard cleanup.
- Proper Disposal: Ensure biohazard materials are disposed of safely and legally.
- Thorough Cleaning: Use professional services for thorough decontamination.
SERVPRO of Lafayette provides expert biohazard cleanup services to ensure safety and compliance.
Mitigating Hail Damage to Your Home or Business
1/10/2024 (Permalink)
Hailstorms can be incredibly destructive, causing significant damage to homes and businesses. The impact of hailstones can lead to roof damage, broken windows, and dented siding, leaving property owners with expensive repairs and potential safety hazards. However, by understanding the risks and implementing preventive measures, you can effectively mitigate hail damage. In this blog, we will discuss essential tips for protecting your home or business from hail damage, minimizing potential losses, and ensuring a speedy recovery.
Conduct a Roof Inspection
- Regularly inspect your roof for any signs of damage or vulnerability.
- Look for missing or damaged shingles, cracks, or holes that may weaken your roof's ability to withstand hail impact.
- Consider hiring a professional roofing contractor to conduct a thorough inspection and provide necessary repairs or reinforcement.
Reinforce Your Roof
- Strengthen your roof's resilience by installing impact-resistant roofing materials designed to withstand severe weather conditions.
- Consider impact-resistant shingles, metal roofing, or rubberized roof membranes for added protection against hail damage.
- Reinforce vulnerable areas, such as edges, corners, and ridge caps, with extra roofing materials to provide additional support.
Protect Windows and Doors
- Install impact-resistant windows and doors that are specifically designed to withstand hail and flying debris.
- Consider adding storm shutters or impact-resistant film to existing windows and glass doors for added protection.
- Reinforce window frames and door jambs to minimize the risk of structural damage during hailstorms.
Maintain Gutters and Downspouts
- Ensure your gutters and downspouts are clear of debris to allow proper water drainage during a hailstorm.
- Securely fasten gutter systems to prevent them from detaching or collapsing under the weight of excessive hail or debris.
- Consider installing gutter guards to prevent clogs and improve water flow, reducing the risk of overflow and water damage.
Secure Outdoor Assets
- Bring outdoor furniture, equipment, and decorations indoors or secure them in a protected area before a hailstorm.
- If relocation is not possible, cover outdoor assets with tarps or heavy-duty covers to minimize hail impact.
- Trim tree branches that could potentially fall and cause additional damage during a hailstorm.
Emergency Preparedness
- Create an emergency kit that includes essential supplies like water, non-perishable food, flashlights, and a first aid kit.
- Have a plan in place for temporary relocation or alternative shelter if your property becomes uninhabitable due to hail damage.
- Keep important documents, like insurance policies and contact information, in a waterproof and easily accessible container.
Review Insurance Coverage
- Regularly review your insurance policy to ensure you have adequate coverage for hail damage.
- Understand your deductible, policy limits, and exclusions related to hail damage.
- Document and photograph the condition of your property before a hailstorm to streamline the insurance claims process, if necessary.
Mitigating hail damage to your home or business requires proactive measures and ongoing maintenance. By conducting regular inspections, reinforcing vulnerable areas, and investing in impact-resistant materials, you can significantly reduce the impact of hailstorms. Don't forget to secure outdoor assets, prepare an emergency kit, and review your insurance coverage to ensure a speedy recovery in the event of hail damage. By prioritizing prevention and preparedness, you'll be better equipped to protect your property and minimize potential losses caused by hailstorms.
Restoring the Past: Cleaning and Restoring Fire-Damaged Documents and Photos
12/18/2023 (Permalink)
A fire can ravage homes and businesses, destroying valuable documents and cherished photos. These items represent memories and history that cannot be replicated, making their loss devastating. Fortunately, trained professionals and specialized equipment can restore these items, even after severe fire damage. In this blog, we will explore the process of cleaning and restoring fire-damaged documents and photos.
Assessing the Damage
The first step in the restoration process is assessing the extent of the damage. Document restoration experts can evaluate the condition of the items and determine the best course of action. They assess factors such as the degree of exposure to smoke and water, the level of charring, and any existing mold or other contaminants.
Cleaning the Documents and Photos
Once the assessment is complete, the actual cleaning process begins. It involves removing any debris, soot, and other fire-related residue that accumulates on the items. The process is delicate, and it requires specialized equipment to avoid further damage. Below are the methods employed in the cleaning process:
Dry Cleaning: This method uses soft brushes, and vacuums to remove the smoke and soot from the surface of the item carefully. It is used to clean sturdy items such as books, binders, and other non-porous surfaces.
Wet Cleaning: Wet cleaning involves using specialized chemicals and water to remove smoke, soot, and debris from the surface of the item. Wet cleaning is appropriate for items such as photographs or paper materials that cannot withstand dry cleaning methods.
Freeze Drying: In cases where the items are soaked with water, freeze-drying is used to restore them. This process involves freezing the items to minimize further water damage and then slowly drying them over a period of time in a vacuum using specialized equipment.
Digital Restoration
After being cleaned and dried, the next step is digitizing the items. Digital restoration technology provides an effective solution for restoring damaged photos and documents. Professional restorers use specialized software and hardware to remove creases, tears, and other physical damage in scanned versions of the items, effectively restoring them to their original condition.
Storage
After the restoration process is complete, the documents and photos must be carefully stored to prevent future damage. They are placed in acid-free storage containers, folders, or envelopes to maintain their quality and integrity. It is essential to store the items in a cool, dry place away from direct sunlight and moisture to avoid further damage.
At times, it may seem hopeless to restore items damaged by fire. Fortunately, document restoration experts are equipped with specialized equipment and expertise to restore fire-damaged documents and photos. The restoration process involves careful evaluation, cleaning, digital restoration, and careful storage in acid-free containers. Through this process, these valuable items can be preserved and cherished for many years to come.
Frequently Asked Questions About Mold
10/26/2023 (Permalink)
 Address FAQ about mold to understand the cause of mold and protect your property.
Mold is a common household issue that can cause various problems if left unchecked. In this blog, we will address frequently asked questions about mold. By providing informative answers, we aim to help you understand mold better and take necessary steps to prevent and address mold-related issues in your home.
What is Mold?
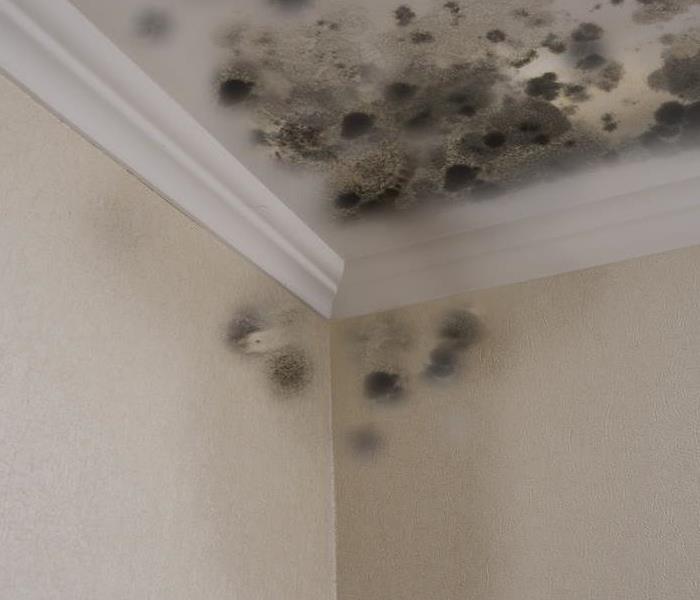
Mold is a type of fungus that can grow in damp environments. It appears as discoloration on surfaces, often green, black, or white in color. Mold reproduces by releasing tiny spores into the air. These spores can settle in various areas of your home and potentially lead to mold growth if conditions are favorable. Mold thrives in moisture-rich environments and can spread rapidly if not properly addressed.
What Causes Mold Growth?
Mold requires moisture to grow and multiply. Common causes of mold growth include water leaks, high humidity levels, condensation, or flooding. Areas with inadequate ventilation, such as bathrooms or basements, are particularly prone to mold growth. Mold can also grow on organic materials like wood or paper if they become damp. Identifying and addressing the source of moisture is crucial in preventing mold growth and spread.
How Can I Prevent Mold?
Preventing mold growth begins with moisture control. Regularly inspect your home for leaks, fix any plumbing issues promptly, and address moisture problems in areas with poor ventilation. Ensure proper airflow and ventilation in bathrooms, kitchens, and other moisture-prone areas. Use dehumidifiers in humid regions or during wet seasons. Keep indoor humidity levels below 60%. Regularly clean and dry affected areas, and promptly remove and replace mold-infested materials.
How Do I Clean and Remove Mold?
Small areas of mold growth can typically be cleaned with a mixture of detergent and water. Gently scrub the affected area, ensuring it is thoroughly dried afterward. More extensive mold infestations might require professional assistance. When cleaning mold, it is essential to wear protective gear such as gloves, goggles, and a respirator. Avoid dry brushing or vacuuming mold, as it can release spores into the air, potentially spreading the problem further.
Can Mold Come Back After Cleaning?
While proper cleaning and removal techniques can eliminate visible mold growth, it's important to note that spores may still be present in the air or on surfaces. These spores can potentially regrow if conditions become favorable again, such as if moisture levels rise. To minimize the chances of mold returning, continue practicing good moisture control, maintain proper ventilation, and promptly address any water leaks or excessive humidity. Regular monitoring and preventive measures can help prevent mold from coming back.
By addressing frequently asked questions about mold we aim to provide valuable information on how to prevent and address mold-related problems in your home. By understanding the causes of mold growth and following proper preventive and cleaning measures, you can maintain a clean and mold-free living environment for you and your family.
Water Damage and Electronics: How to Save Your Soaked Devices
10/17/2023 (Permalink)
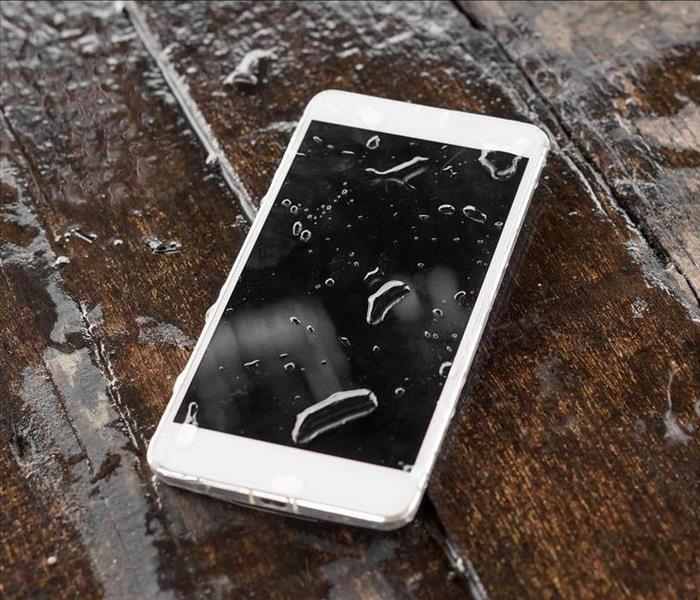 Remember, restoring water-damaged electronic devices is not always guaranteed to work, but these tips can help increase your chances of success.
Water damage is a common problem that can affect electronic devices like smartphones, laptops, and tablets. Whether it's a spilled drink or an accidental drop in the pool, exposure to water can cause significant damage to electronic devices. However, with the right approach, restoring water-damaged electronics is possible. In this blog post, we will explore some useful tips for handling water-damaged devices.
Power off the Device
The first step when dealing with water-damaged electronics is to switch off the device immediately. This helps to prevent further damage that can be caused by a power surge. For devices like smartphones and laptops, remove the battery, SIM card, and any other removable parts. This helps to prevent any further damage to these components.
After removing the removable parts, dry the device as much as possible. Use a soft, absorbent cloth to wipe away any visible water on the device. Alternatively, you can use a can of compressed air to blow out any water that may be inside the device.
Use a Desiccant Material
Place the device in a container of desiccant material to help absorb the remaining moisture. Popular desiccants include dry rice, silica gel, and kitty litter. Leave the device in the container for several hours to allow the desiccant material to absorb the moisture. Use a soft cloth or tissue to gently wipe away any visible water on the device's exterior. Be careful not to rub the water further into crevices or openings. Using waterproof cases or covers can provide an extra layer of protection for your devices. These accessories are designed to prevent water from seeping into the device in case of accidental exposure.
Seek Professional Help
If you are unable to restore your device on your own, consider seeking professional help. Many electronics repair shops specialize in repairing water-damaged devices. A professional technician will have the necessary tools and expertise to restore your device safely and effectively.
Avoid Common Mistakes
When trying to repair your water-damaged electronic device, avoid common mistakes like using a hairdryer to dry the device or placing the device in direct sunlight. The heat can damage your device further and will do more harm than good. When using electronic devices outdoors, be aware of weather conditions. If rain or storms are in the forecast, take extra precautions to keep your devices dry.
Remember, restoring water-damaged electronic devices is not always guaranteed to work, but these tips can help increase your chances of success. The key is to act fast and follow the right steps to avoid further damage and increase the chances of restoring your device. In some cases, it may be more cost-effective to replace the device entirely, especially for older electronics. However, if you have a newer or more expensive device that you wish to salvage, following these simple tips can help restore it to its former glory. Prevention and quick action are key when it comes to water damage. Taking the necessary precautions and knowing how to handle a water-damaged device can save you time, money, and the inconvenience of being without your favorite gadgets.
Stay Alert. Protecting Your Property from Hailstorms
9/23/2023 (Permalink)
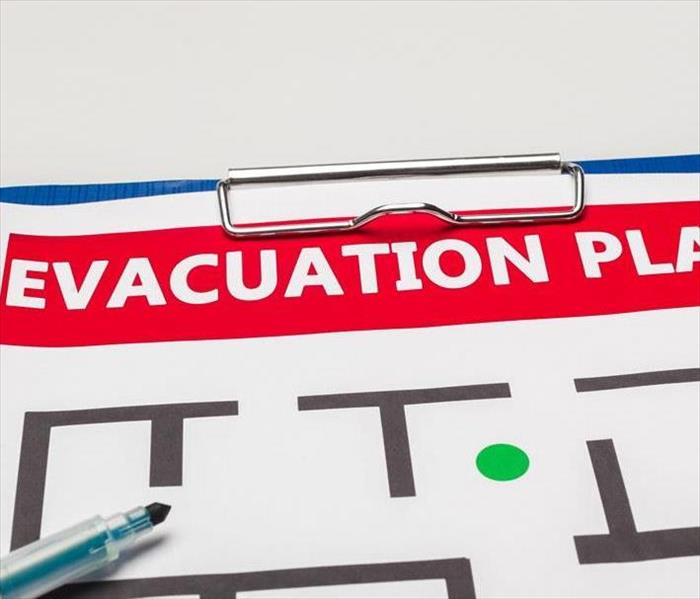 Have an emergency plan in place incase of a storm.
Hailstorms can be incredibly destructive, causing significant damage to your property. From shattered windows to dented roofs, the impact of hail can be devastating. However, there are proactive measures you can take to protect your property from hailstorm damage. In this blog post, we will discuss some practical tips to safeguard your property and minimize the risk of hailstorm damage.
Stay Informed
One of the most effective ways to protect your property from a hailstorm is to stay informed about weather conditions. Pay attention to weather forecasts and warnings, especially during hailstorm seasons. Keep a reliable source of weather information handy, such as a weather app, to receive real-time updates. This will enable you to take timely action to protect your property.
Windows and doors are vulnerable to hailstorm damage. Consider installing impact-resistant windows and reinforced doors as they are designed to withstand the impact of hailstones. If replacing windows and doors is not an option, protect them with storm shutters or window film. These measures will provide an added layer of protection against hail damage.
Maintain Roof and Gutters
A well-maintained roof and gutters can help protect your property during a hailstorm. Regularly inspect your roof for loose or damaged shingles. Replace any missing or broken shingles promptly to maintain the integrity of your roof. Clean your gutters and downspouts to ensure proper drainage. Clogged gutters can overflow during a storm, leading to water backup and potential damage to your property.
Reinforcing your roof can provide added protection against hailstorm damage. Consider installing impact-resistant roofing materials, such as metal or asphalt shingles specifically designed to withstand hail. Reinforcing vulnerable areas, such as eaves and overhangs, can also minimize the risk of hail damage. Consult with roofing professionals to determine the best options for your property.
Trim Trees and secure Outdoors
Trees and branches can pose a significant risk during a hailstorm. Trim back overhanging branches and remove dead or weak trees near your property. This will reduce the chances of branches breaking off and causing damage to your property during a storm. Regular maintenance of trees and landscaping can help minimize potential hazards during severe weather conditions.
Outdoor items, such as patio furniture, grills, and garden tools, can become projectiles during a hailstorm. Secure or bring these items indoors before a storm approaches. Move vehicles into a garage or carport if possible. Protecting these belongings will prevent them from being damaged or causing additional damage to your property.
Install Hail Protection Systems
Consider investing in hail protection systems to safeguard your property. Hail guards, heavy-duty hail nets, or hail protection blankets can be installed over vulnerable areas, such as skylights, solar panels, or outdoor structures. These systems provide an extra layer of defense against hail damage by reducing the impact and preventing direct contact with vulnerable surfaces.
Regularly review your insurance policy to ensure you have adequate coverage for hailstorm damage. Understand the terms and conditions, including deductibles and coverage limits. If you live in an area prone to hailstorms, consider adding additional coverage specific to hail damage. Consult with your insurance provider to discuss your options and make any necessary adjustments to your policy.
Create an Emergency Plan
Having an emergency plan in place can help you react quickly and protect your property during a hailstorm. Identify a safe area within your property, such as a basement or an interior room on the lowest level, where you can take shelter during a severe storm. Prepare an emergency kit with essential supplies, including flashlights, batteries, first aid supplies, and a portable weather radio. Protecting your property from hailstorm damage requires proactive measures and preparedness. By implementing these strategies, you can significantly minimize the risk of hailstorm damage and protect your property effectively.
When Should I Change Smoke Alarm Batteries? A Guide to Ensuring Your Smoke Alarms are Always Ready
9/12/2023 (Permalink)
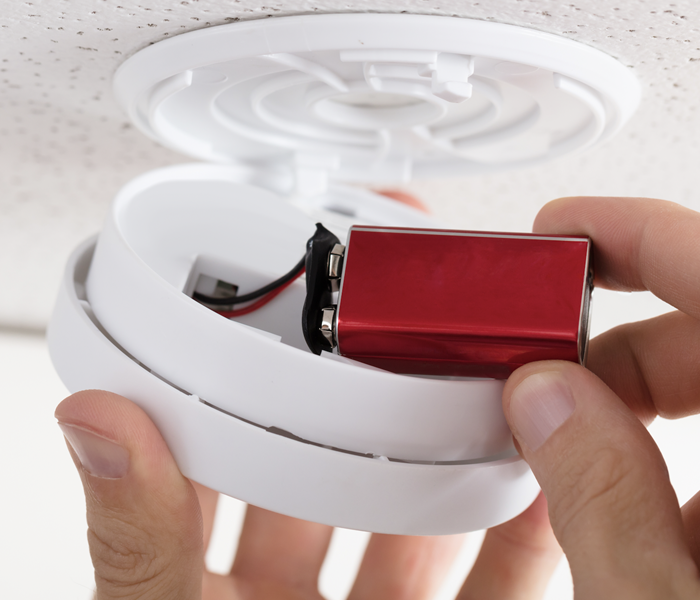 Changing smoke alarm batteries frequently is essential to ensuring your property is safe incase of a fire.
Smoke alarms are an essential safety feature in every home, helping to alert you and your family to the presence of smoke and potential fires. But to ensure their effectiveness, it's crucial to regularly maintain and replace the batteries in your smoke alarms. In this blog post, we'll discuss when you should change smoke alarm batteries and provide helpful tips to keep your home safe.
General Guidelines for Battery Replacement
Test Your Smoke Alarms Monthly
It's essential to conduct a monthly test of your smoke alarms to ensure they are functioning correctly. This will help you identify any issues and ensure that the batteries are still working. During the monthly test, listen for the loud, distinctive beep that indicates the alarm is functioning properly.
Replace Batteries Twice a Year
To ensure optimal performance, it's recommended to replace the batteries in your smoke alarms at least twice a year. A good rule of thumb is to change the batteries when you change your clocks for daylight saving time. This makes it easy to remember and helps ensure a regular schedule for battery replacement.
Use Long-Life Batteries
Consider using long-life lithium batteries for your smoke alarms. These batteries have a longer lifespan compared to traditional alkaline batteries and can last up to 10 years. However, it's still important to check and test your smoke alarms regularly, even if they are equipped with long-life batteries.
Additional Factors to Consider
Most smoke alarms are equipped with a low battery warning feature. When the battery power gets low, the alarm will emit a periodic chirping sound. If you hear this sound, it's a clear indication that it's time to replace the batteries. Do not ignore or disable the low battery warning, as it compromises the effectiveness of the smoke alarm.
Aging Smoke Alarms
Smoke alarms have a recommended lifespan of 10 years. After this period, they may become less effective and unreliable. It's a good practice to replace smoke alarms that have reached or exceeded their expiration date.
In addition to battery replacement, ensure that your smoke alarms are clean and free of dust. Regularly vacuum or blow air through the vents to keep them functioning optimally. Also, regularly check the manufacturer's instructions for specific cleaning and maintenance requirements for your smoke alarms.
Regularly changing smoke alarm batteries is essential for maintaining a safe home environment. By following the general guidelines of testing monthly and replacing batteries twice a year, you can ensure that your smoke alarms are always ready to detect smoke and potential fires. Remember to use long-life batteries, pay attention to low battery warnings, and replace aging smoke alarms as needed. By prioritizing maintenance and battery replacement, you can have peace of mind knowing that your smoke alarms are working effectively to protect your home and loved ones.


 24/7 Emergency Service